How to Take Off Shellac Nail Polish
Understanding Shellac Nail Polish
How to take off shellac nail polish – Shellac nail polish, a hybrid of traditional nail polish and gel, offers a long-lasting, high-shine finish. Understanding its composition, advantages, and disadvantages is crucial for safe and effective removal.
Shellac’s Chemical Composition
Shellac nail polish is primarily composed of a blend of polymers, resins, and pigments. These components create a durable, chip-resistant coating that adheres to the natural nail. The exact formulation varies between brands, but the core ingredients contribute to its unique properties. The resin component provides adhesion, the polymers offer flexibility and strength, and the pigments provide color and opacity.
Shellac vs. Regular Nail Polish
The key difference between shellac and regular nail polish lies in its application and longevity. Regular nail polish dries through evaporation, while shellac requires curing under a UV or LED lamp. This curing process creates a harder, more durable finish that lasts significantly longer – typically two to three weeks, compared to a few days for regular polish. Shellac also tends to offer a smoother, glossier appearance.
Advantages and Disadvantages of Shellac

Source: nailsbymets.com
Shellac offers several benefits, including its extended wear time, high shine, and resistance to chipping and smudging. However, it also has drawbacks. The removal process is more complex than regular polish and requires specific products. Frequent use can potentially weaken the nails if not properly cared for. Furthermore, the UV/LED curing process has been a subject of debate regarding potential long-term effects on nail health, although current research is inconclusive.
Gathering Necessary Supplies
Properly removing shellac requires specific tools and materials. Using high-quality products ensures a smooth and safe removal process, minimizing the risk of nail damage.
Necessary Tools and Materials
| Item | Purpose | Brand Recommendation (optional) | Notes |
|---|---|---|---|
| Acetone | Dissolves the shellac polish | OPI, CND | High-quality, 100% pure acetone is crucial for effective removal. |
| Cotton balls or pads | Apply acetone to nails | Any brand | Choose lint-free options to avoid residue. |
| Aluminum foil | Wraps cotton soaked in acetone around nails | Any brand | Provides a seal to enhance acetone’s effectiveness. |
| Orangewood stick or cuticle pusher | Gently remove softened shellac | Any brand | Avoid sharp metal tools to prevent nail damage. |
| Nail buffer | Smooths nail surface after removal | Any brand | Optional, but helpful for a polished finish. |
| Cuticle oil | Moisturizes and nourishes cuticles and nails | CND, Sally Hansen | Essential for post-removal nail care. |
Importance of High-Quality Acetone
Using high-quality, 100% pure acetone is paramount for efficient shellac removal. Impurities in lower-grade acetone can leave residue and potentially damage nails. Pure acetone ensures thorough and quick removal, minimizing the time the nails are exposed to the solvent.
Step-by-Step Removal Process
Following these steps ensures a safe and effective shellac removal, minimizing the risk of nail damage or irritation.
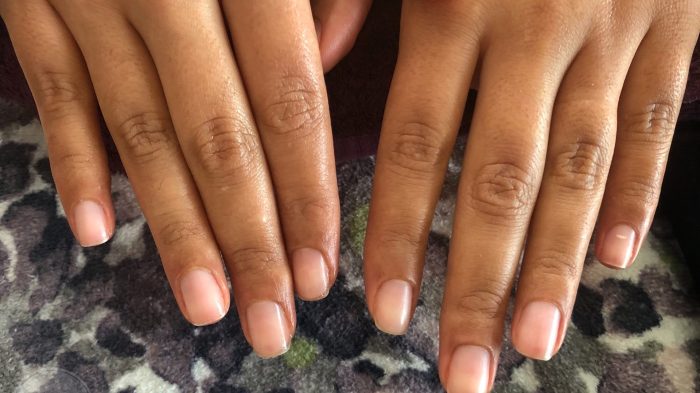
- Step 1: Preparation. The image shows a hand with shellac nails, ready for the removal process. The cuticles are visible and the nails are a uniform color. Begin by gently cleaning the nails of any loose debris or dirt.
- Step 2: Acetone Application. Soak a cotton ball or pad generously with acetone. Place the saturated cotton ball onto each nail, ensuring complete coverage.
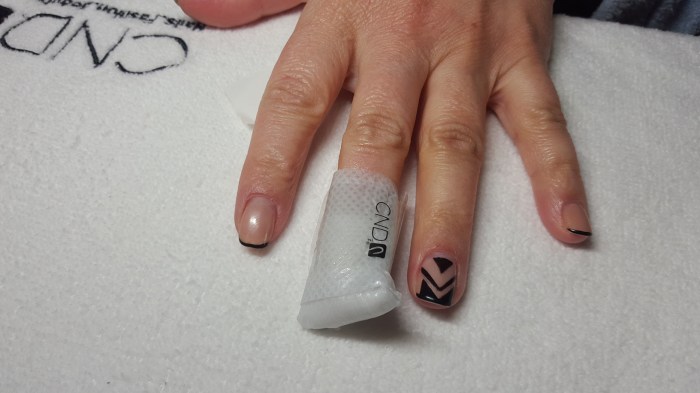
- Step 3: Foil Wrapping. Wrap each nail individually with a small piece of aluminum foil, securing the cotton pad firmly in place. This creates a sealed environment, enhancing the acetone’s effectiveness.
- Step 4: Soaking. Allow the acetone-soaked cotton to sit on the nails for 10-15 minutes, or until the shellac softens significantly. The image shows the hands with foil-wrapped nails, waiting for the shellac to soften.
- Step 5: Removal. Carefully remove the foil and cotton from each nail. The shellac should be noticeably softened. Use an orangewood stick or cuticle pusher to gently push the softened shellac off the nail. The image shows the gentle removal of the softened shellac using an orangewood stick.
- Step 6: Smoothing. If any small remnants of shellac remain, use a gentle nail buffer to smooth the nail surface. Avoid excessive buffing to prevent nail thinning.
- Step 7: Post-Removal Care. Apply a generous amount of cuticle oil to moisturize and nourish the nails and cuticles. The image shows the application of cuticle oil to the nails and cuticles after shellac removal.
Each step is crucial to ensure a complete and safe removal. Proper soaking time is essential to soften the shellac, preventing excessive force during removal. Gentle manipulation prevents nail damage, and post-removal care is key to maintaining nail health.
Dealing with Difficult Removal
Occasionally, shellac removal can be challenging. Understanding common issues and their solutions ensures successful and safe removal.
Common Problems and Solutions, How to take off shellac nail polish

Source: brokemynail.com
Stubborn shellac can be caused by several factors, including the type of shellac used, the application technique, and the quality of the acetone. Damaged nails can result from forceful removal or using harsh tools. If the shellac doesn’t soften readily, try extending the soaking time. For particularly stubborn areas, consider using a gentle nail file to lightly buff the surface before re-applying acetone.
Always prioritize gentle removal techniques to prevent nail damage.
Preventing Difficult Removal
Choosing high-quality shellac and acetone significantly reduces removal difficulties. Proper application, ensuring complete coverage and proper curing under the lamp, also helps prevent stubborn shellac. Regular maintenance, such as moisturizing the nails and cuticles, helps maintain nail health and prevents issues during removal.
Post-Removal Nail Care: How To Take Off Shellac Nail Polish
Post-removal nail care is crucial for maintaining healthy nails after shellac removal. Proper care strengthens the nails and promotes healthy growth.
Nourishing and Strengthening Nails

Source: naildesigncode.com
Following shellac removal, the nails may be slightly dehydrated or weakened. Applying cuticle oil regularly hydrates and nourishes the nail bed. Using a nail strengthener can help reinforce the nails and prevent breakage. Avoiding harsh chemicals and excessive exposure to water also contributes to healthy nail growth.
Sample Weekly Nail Care Routine
A sample weekly routine includes daily application of cuticle oil, twice-weekly application of a nail strengthener, and avoiding prolonged exposure to water or harsh chemicals.
Comparing Removal Methods
Several methods exist for shellac removal, each with its advantages and disadvantages. Choosing the appropriate method depends on individual nail type and condition.
Comparison of Shellac Removal Methods
| Method | Pros | Cons | Time Required |
|---|---|---|---|
| Soaking (with acetone) | Gentle, relatively quick, readily available supplies | Can take time, may not remove all shellac completely | 15-30 minutes |
| Filing | Removes shellac quickly | Risk of damaging nails if not done carefully, requires skill | 5-10 minutes |
| Electric File | Fast and efficient, especially for thick shellac | Requires training and proper technique, potential for significant nail damage if misused | 5-10 minutes |
Soaking is generally the safest method for most individuals, while filing and electric filing should be performed by professionals to minimize nail damage.
Safety Precautions
Taking proper precautions during shellac removal is crucial to ensure both nail and skin health.
Avoiding Hazards
Always work in a well-ventilated area when using acetone to minimize inhalation. Avoid prolonged skin contact with acetone as it can cause dryness and irritation. Use appropriate protective measures, such as gloves, to minimize exposure. Never force the removal of shellac, as this can lead to nail damage or injury. If experiencing any irritation or discomfort, discontinue the process and consult a professional.
Question & Answer Hub
Can I use regular nail polish remover to remove shellac?
No, regular nail polish remover is not strong enough to dissolve shellac. You need acetone-based remover.
Removing shellac nail polish requires a bit more effort than regular polish; you’ll need acetone and some patience. If you’re looking for a long-lasting, yet easily removable alternative for a natural look, consider using a base coat like a clear white nail polish before your next manicure. However, even with these alternatives, diligent soaking in acetone remains the key to effectively removing stubborn shellac.
How often should I remove my shellac manicure?
It’s generally recommended to remove shellac every 2-3 weeks to prevent nail damage and allow your natural nails to breathe.
My nails are thin and brittle. What should I do?
Use a gentle soaking method and prioritize post-removal nail care with strengthening treatments and cuticle oil.
What if some shellac remains after soaking?
Gently buff the remaining shellac with a fine-grit file. Avoid excessive filing to prevent nail damage.


